|
I am writing this page in English with Google translator. Click the Danish version and see the original Danish website.
This English page is suitable for PC - Tablet - Mobile phone. |
Having said Smoking, one must also say Grilling. Find a topic below |
Outdoor Grill in red brick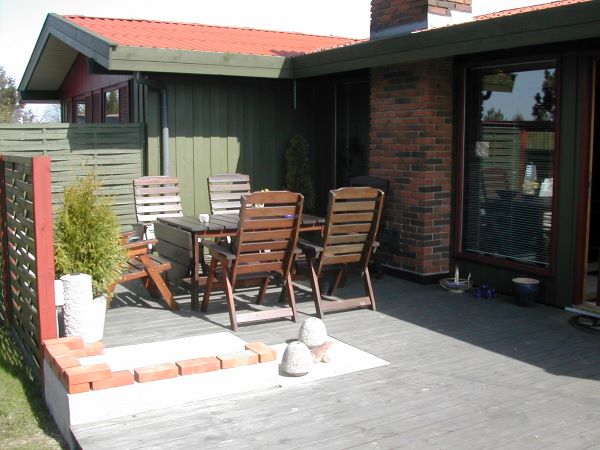
The foundation is ready for the Barbecue The next project is an outdoor Barbeque to handle large tasks. There will be more about this, as the project progresses. Foundation was cast 2 years ago in connection with the renovation of the terrace. So I start here with pictures. My chimney on the right in the picture is made of red brick, so the Grill is also built in red brick. New bricks now cost a fortune, but try a recycling site or look around the countryside where houses are being built. Contact the developer and ask him if you can buy bricks when construction is complete, if some bricks are left over. It is almost the case. It was in this way, I had bought 300 bricks for 500.00 DKK. 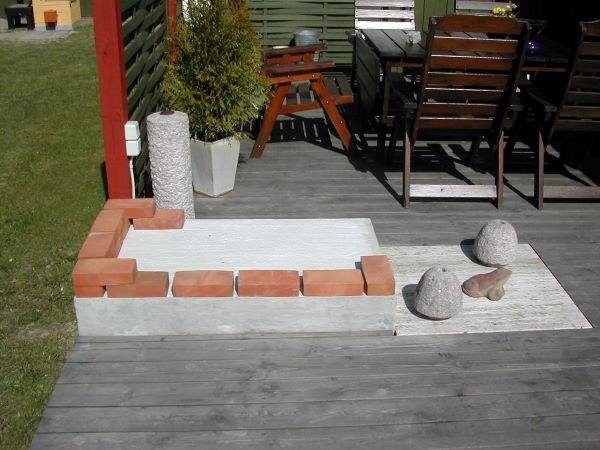
The foundation is ready for the Barbecue Continuation follows in year 2004. For now in the summer of 2003 we have got a great homemade Grill, which is excellent. I'm missing just a rotating spear with a keeping device for chickens and various roasts. I don't do it anymore, I have contacted Can-Scan. They have everything in barbecue accessories in a very good quality at reasonable prices. 
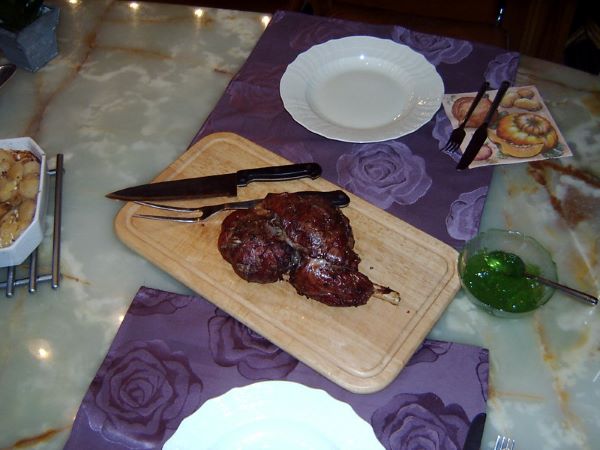
The wife is busy with the new Grill My brick grill is on hold for the time being. The large homemade sheet iron grill and the ball grill provide full coverage for our needs. And now the red bricks are also used for something else. Which is clear from the picture below. The lawn was destroyed by the traffic back and forth from the outdoor kitchen. 
Fixed "tile" walk of red bricks. The cat admires my work As every year serious incident involving the use of barbecue, I will come with a warning not to move the grill inside. When wood and charcoal embers, there is a combustion with a deficit of air (oxygen), and developed carbon monoxide (Carbon Monoxide - CO), which is an invisible, tasteless, odorless and deadly poisonous gas. You get an insidious carbon monoxide poisoning and "sleep" directly into death. Therefore NEVER bring a grill/smoking oven inside, but leave it in the garden. Search on Google under "Carbon monoxide poisoning grill" and read the many unfortunate events. |
Before you start to Grill you should visit this website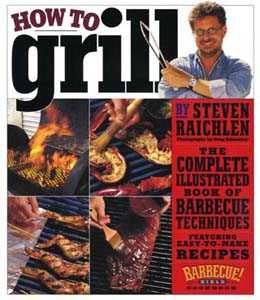
How to Grill by Steven Raichlen These books are easy to read; books published in original English version. The American author, Steven Raichlen, is considered a great barbecue guru in the USA, and has published a total of 24 books. 
How to Grill by Steven Raichlen Since June 2003, Steven Raichel has also had his own barbecue television series on television in the United States. Steven Raichel also offers a 3 day BBQ grilling course at the very famous Greenbrier Resort in West Virginia, teaching in some of the most modern indoor and outdoor facilities. For extra information and help, a website has been created in English, where there will be more recipes, links, forum, grill and various accessories. |
Here's something for you if you do not want to build your own barbecue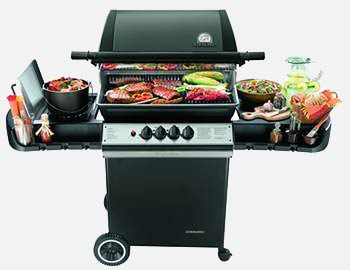
*Sterling Gasgrill from Can-Scan This Sterling gas grill that you see above is probably one of the "flagships" that Can-Scan can offer. If you go to the Can-Scan website, you will find several models that may suit your needs better. Picture below shows Can-Scan's exhibition in Forum 2004. Call Finn at Can-Scan on tel. 47 53 10 10 and get a good offer on a Grill that suits your needs. 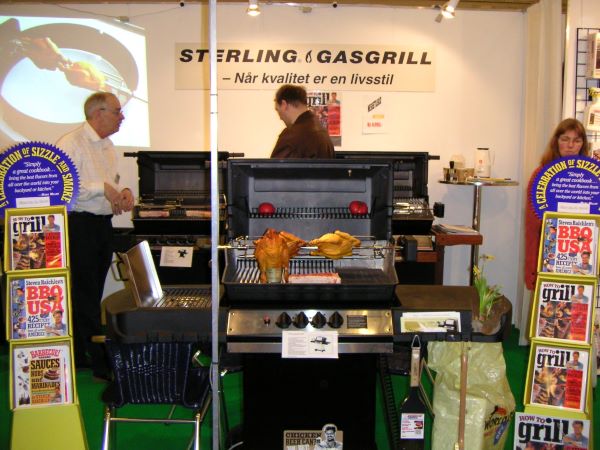
Can-Scan's exhibition in Forum 2004 You'll also find many different kinds of barbecue accessories that you can usefully apply to the grill, you might have in advance. 
Can-Scan's exhibition in Frederiksberg Have 2017 GASTRONOMY: The theme offers gastronomic temptations from exquisite suppliers. Gastronomy exhibitors are offered a special area with plenty of space to present the many guests with the best that can be offered in Danish cuisine. At the same time, the audience can satisfy their hunger at a number of exciting restaurants and cafes, where the good food experience is at the centre. 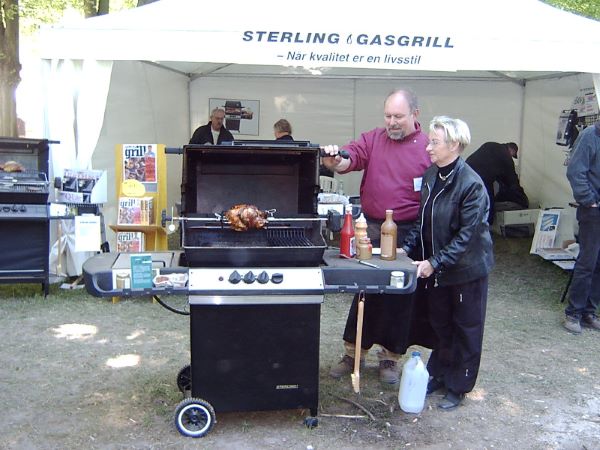
Can-Scan's exhibition at Ledreborg Castle 2017 The Company Can Scan will as previously be found at the exhibition "Lifestyle" in Ledreborg Castle Park and Frederiksberg Garden. All of the many models of Sterling Gasgrill will be exhibited, and several of them will also be in use, so you can taste the barbecue dishes. There will also be a professional chef who preparing dishes from the book How to Grill. Come and join. The exhibited items can be purchased directly from the booth. |
Then I'm working on my new barbecue skewer with motorSuper strong grill skewer with motor and counterweight from Can-Scan must now be mounted on my homemade plate iron grill. 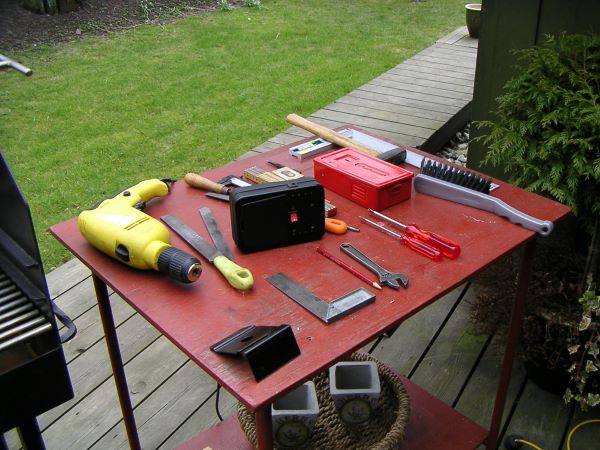
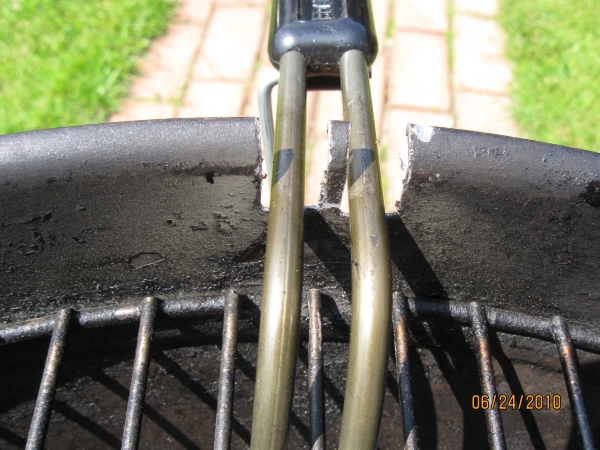
Powerful barbecue skewer with motor and counterweight. Can also be used for a ball grill I have measured up where the grill-spear must be placed and drilled two 16 mm holes in each side of the grill. Spear center is approx. 160 mm above the grate. On the right side where the motor must be placed I have drilled the hole 150 mm down from the top edge. The left side I have drilled the hole 157 mm down from the top edge. Bearing is 14 mm and spear ought to be horizontal, therefore this difference. The left side is cut from the top and down to the drilled hole. The cutting is 16 mm wide. File the edges and rounded the top, so you do not cut yourself. 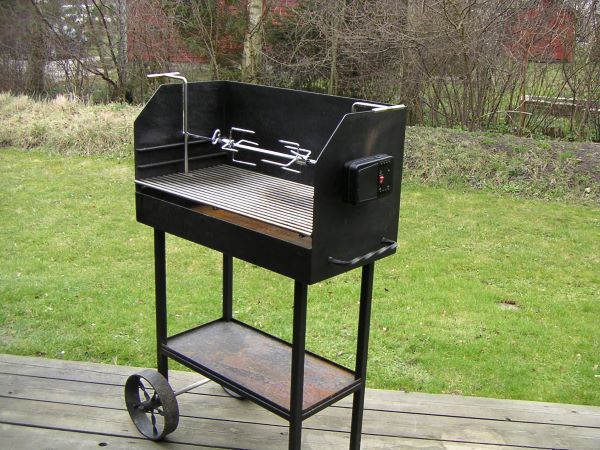
Powerful barbecue skewer with motor and counterweight. Can also be used for a ball grill Motor bracket should now be mounted on the right side. The supplied brackets do not fit my grill because my grill is 35 mm longer than the spear can reach. Bracket may be easily modified by cutting a piece and bend it 35 mm shorter than before. Max length of barbecue is 700 mm. Then fit the bracket with two M6 machine bolts and lock nuts. The motor is powered by two 1.5 V batteries type D, but can also be connect to an adapter for 230VAC/3VDC. |
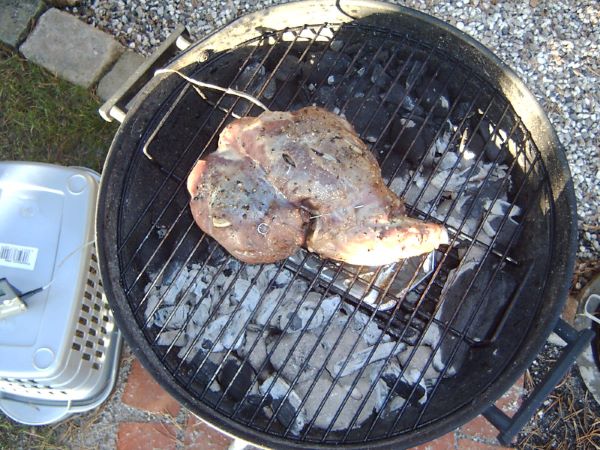
It is now time to test the Grill with a "Summer Duck"Finally, it was fairly barbecue weather in Whitsun 2004. But we could not sit outside and eat, so we covered up indoors. The Lady in the house had found a Christmas duck in the freezer, which could be exciting to try in a new way and on the new grill with the motor driven spear. I intend to make a salted, light juniper smoked duck in the following way: Thaw the deep-frozen duck in the refrigerator for 24 hours. It is then placed in a 13% brine or 10 °Baume for 3 hours in a refrigerator at a maximum of 5°C, after which it is rinsed in cold water and dried with a tea towel. 3 l water and 450 g salt. 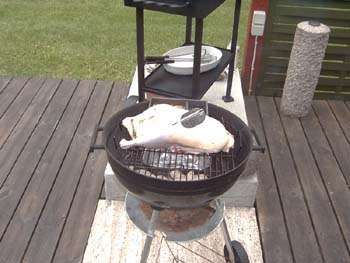
The duck is ready for smoking in the barbecue The duck filled with parsley, green leafy celery tops, and a little thyme. Do you have other herbs in your garden, try just these. The Ball Grill prepared for indirect heat. Cast-iron box with room for juniper crumbs and water placed directly over the coal on one side. The duck in the middle on top of a alum tray to collect the grew fat. At the other side, the new potatoes, brushed in olive oil and sprinkle with coarse salt were placed. Lid placed on the Ball Grill with closed valve at the top and open valve at the bottom. Now it's just to keep up with the temperature inside the duck with a roast thermometer. These are available in several versions, the one shown here can sit in the duck during the roasting. The digital thermometer can not. 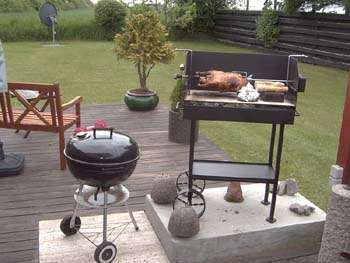
The skin is finally made crispy The duck is brushed with Gammel Dansk Mjřd during roasting until the temperature in the duck has reached 78°C. It is then taken out and put on the motor spit and gets "bang heat" until the skin is crispy and an internal temperature of 80°C. Served with a good summer salad of your choice and new potatoes, possibly also with flutes. Use the frying fat with Gammel Dansk Mjřd as a dipping sauce. Cast iron smoke box for smoke dust
Summer duck salted and lightly juniper-smoked in a ball grill 80°C to 85°C Turkey and roast pork with rind 80°C Chicken and Poultry "Well done" - Well done 75°C Beef, veal, pork and lamb "Medium" - Faint pink core 70°C Beef, veal, pork and lamb "Rare" - Red core 60°C Beef and veal fillet and roast beef 70°C Christmas ham 55°C Whole fish with bones and fish fillet/fish block |

Here I intend to write about how to smoke in different Ball Grill and Smoking OvenI want to correct a misunderstanding that I have heard or read that some one do. Don't ignite smoke crumbs in lunchbox Smoking Oven with methylated spirits. Do not use wood dust from a sawmill that uses chainsaw. This chainsaw wood dust contains mineral oil which is toxic. Only use wood dust from hardwood trees. There is one exception and that is the juniper wood dust. It is used as a spice. Add approx. 10% to the mix and you get an excellent taste. 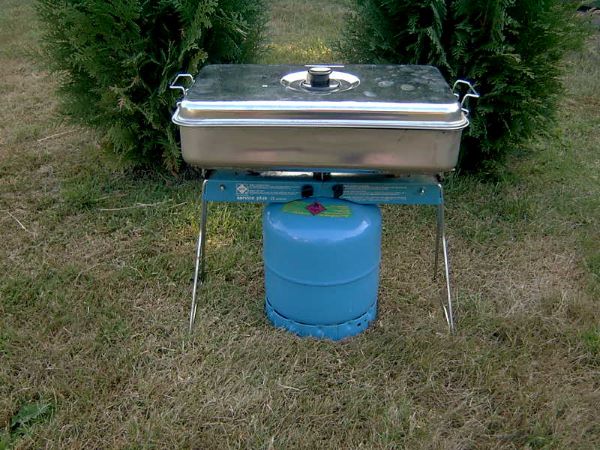
Lunch box smoker used on camping gas If you want to experiment with "smoke spice" you can mix juniper, rosemary, paprika and crushed pine cones. Mix those four things in 1:1 ratio and apply the mixture with beech wood dust in the ratio 10% and 90% beech wood dust. I have only tried this with eels in my great Smoking Oven. The world's best eel. A good tips: If the valve is not open in the beginning, water vapor will condense on the lid and trickle down to the fish, so this is stained black. It is not toxic in small quantities, does not taste good and don't look appetizing. Is the valve in lunchbox not designed properly, it will always occur. You can put aluminium foil over the fish so that you avoid this debacle. But avoid any problem by venting. Make even your own spice mixtures, but remember only use pure products. 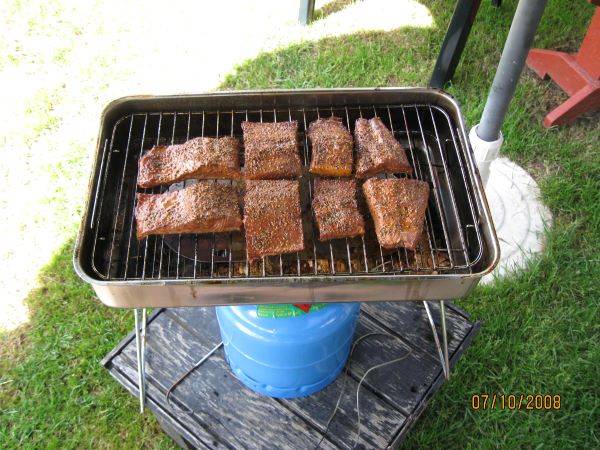
This was a 1.4 kg rainbow trout Lunchbox Smoking Oven, Box Smoking Oven, ABU Smoking Oven or "Casper Rřghat" dear child has many names. Common to all these small enclosed Smoking Ovens is that they are pressure cooker and add the fish with a smoked flavor. It's alright, you have to remember where using these small Smoking Ovens. For your fishing, when you want to eat a fish caught in the wild. You do the following: Clean the fish thoroughly for slime and scale, cut head and tail of so the fish may lie in Smoking Oven. Is it a big fish, one can usefully fillet the fish first, but keep the skin on. The fish is salted exterior and interior and air-dried for min. 30 minutes in air current, but not in the sun. Keep the flies away. A layer of 5 to 10 mm wood dust placed at the bottom of lunchbox and fish placed on the grid with skin side down. Is there a drip tray, use it. The lid is in place with an opening of 10 mm, or the lid is put on with clips as shown in this picture. Valve must remain open. 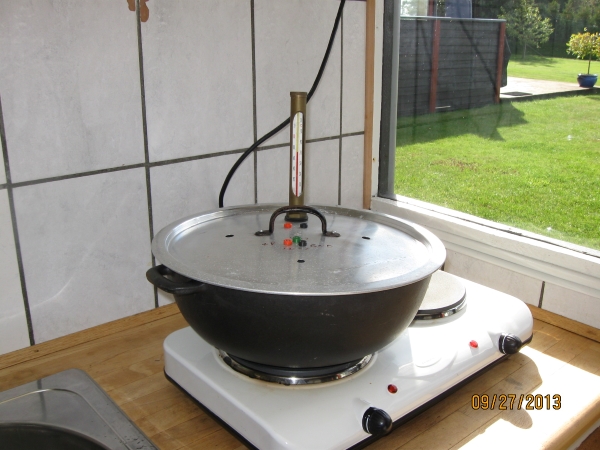
Cast iron Pot Smoker for EL Turn on the gas or the included methylated spirits boiler, put over the lunchbox for 10 minutes with an open valve so that steam can escape. Switch off now and wait 10 minutes before being switched on again, but now with the closed valve. After 10 minutes should smaller fish be prepared, now switch off the gas but wait like 10 minutes before the fish is taken out. Smoking at those 10 minute intervals, you get a better result. Please try your way with the times and intervals. When you do this first time, then observe whether the fish has been done too much or too little. Or is all smoke crumbs used? Remember there will almost be unused smoke crumbs in the 4 corners. Next time you can adjust the time and amount of smoke crumbs when you create a new meal. Note: There are significant differences in thermal evolution between gas and methylated spirits. Those times are on my camping gas, which has a higher heat than a methylated spirits boiler. Try this recipe for Smoked cod roe. 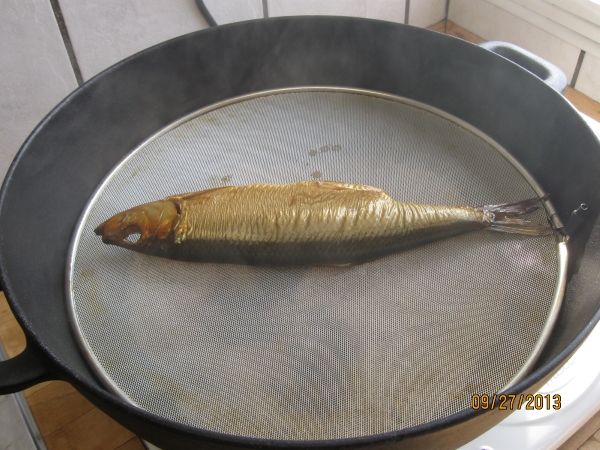
Smoked herring in a cast iron smoker I have to come here with a warning to the two methylated spirits boiler: Place them on a non combustible surface. Never add methylated spirits to the container when it is hot, or already in flames. Fill not completely. It should not be able to see the methylated spirits over the material in the container. As this occurs, one can hardly extinguish the flames with a lid. Should the accident be out, extinguished the flames with sand or a fire blanket. NEVER WATER. And also don't forget: NEVER take a grill/smoker inside, but leave it outside in the garden. A poisonous gas, carbon monoxide CO is developed, NB: My cast iron pot smoker is in my outdoor kitchen, so I have sufficient ventilation and no danger of the poisonous gas carbon monoxide CO. |
Ordinary ball grill as "Smoking Oven"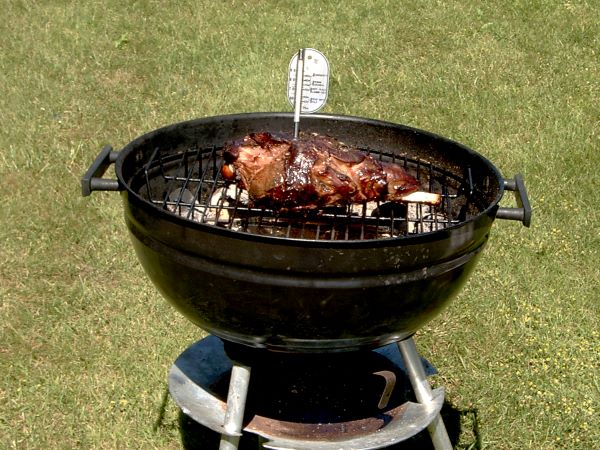
Smoked leg of lamb in ball grill Most people have probably got a regular, cheap ball grill for the garden, and have now replaced it with one of the big, expensive luxury gasgrill. If you have the old ball grill standing in the shed and do not know what to do with it, so here is a good proposal. 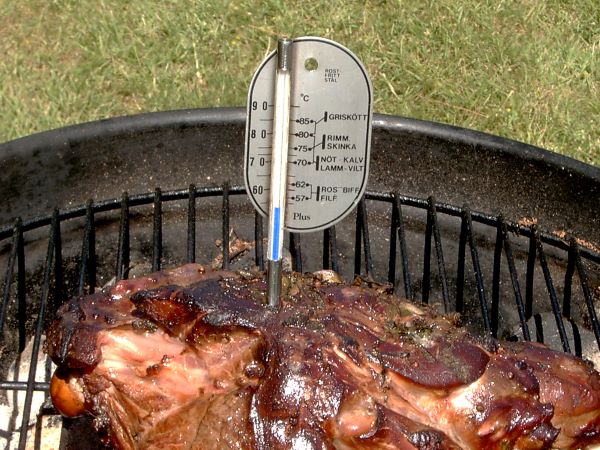
Smoked leg of lamb in ball grill If you do not want a smoke flavour added your meat when you use the new gasgrill, you obviously do not use it as Smoking Oven. You can use the old ball grill as Smoking Oven. Fire up as usual, either directly or indirectly. When the ball grill is appropriate warm approx. 175°C presented the fish or meat on the grid and two handful moistened beech wood dust sprinkled on the coal in each side. Four in total. The lid is placed on the ball grill again and fish and meat are "Smoke roasted." The time depends if it is fish or meat and the size of the meal and the temperature that you can keep inside the ball grill. The thermometer showed helps greatly. A digital thermometer can also be used. Plug the sensor into the thick part of the fish or meat and pull the warm protected cord out of the ball grill away from the hot coal. When the temperature is between 55°C and 80°C, fish or meat is finished done. See table above. 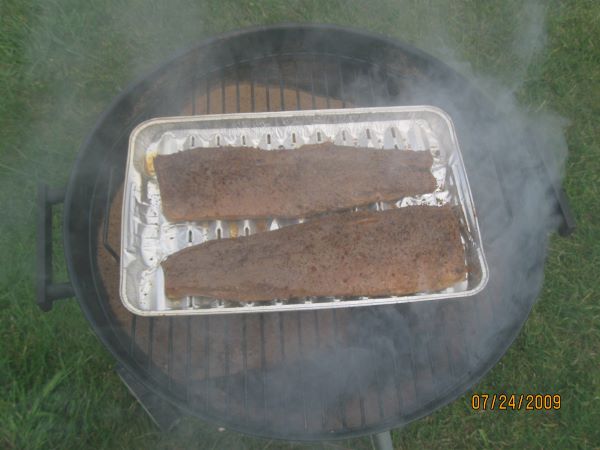
Smoked rainbow trout The size of beech wood dust is not as important in a ball grill, but all that is mentioned above, is crucial for success. Do you have a spice garden, you can pick herbs and put them on coal and get a nice taste of the fish or meat. Remember just that the beech wood dust must be moistened with water so as not to flame up right away. Press the water out by hand before the beech wood dust is sprinkled on the coal. The rainbow trout in the lower picture on the right has been given 20 minutes at 80°C. 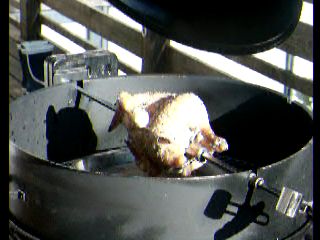
Grill-Ring for the motor If you have a skewer with a grill motor, an investment in a Grill Ring could be a good idea. Now you can grill and smoke at the same time. |
Cast iron pot used as a smokerThe idea of the old cast iron pot used as a smoker re-appeared after I found it in the "fish house". In fact, it is the pot that was the Heating box for my experiments with the new temperature controller. The pot is 13 cm high and has an internal diameter of 32 cm and the grid on which the fish lies is a splash cover for a frying pan of Ř 30 cm, where the handle has been sawn off. The lid is an old aluminum lid machined for a thermometer, temperature sensor LM35DZ and an NTC resistor. In addition, drill 3 pcs. ř 10 mm holes for secondary air supply. The 3 holes and a thermometer are minimum requirements.
My outdoor kitchen with a cast iron pot used as a smoker The cast iton pot was filled with half a liter (130 g) beech wood, splash lid put in and turned up to max heat. After 10 minutes, began smoke and the herring was put in. After some time the temperature began to rise to 80°C and I turned down the heat so I could keep a constant temperature of 70°C. After 1 hour the herring was well done.
The cast iron pan can smoke some fantastic herring It is my intention to use this cast iron pot for smoking cod roe in smaller portions when the cod fishing season comes. So watch this website when the first cod roe have been smoked. NB: My cast iron pot smoker is in my outdoor kitchen, so I have sufficient ventilation and no danger of the poisonous gas carbon monoxide CO. |
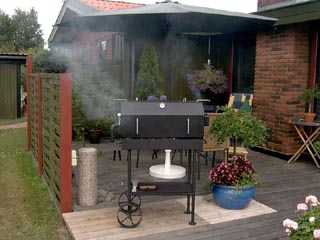
Vertical smoke oven in stainless steelMy fishing buddy Dan bought a Peetz smoker and has asked me helping with the first smoking of herring, which he caught in Řresund here in October. The herring was salted and dried as directed. Sawdust tray was filled with fine sawdust and the setting of electric controller was set on 5 (max). After a short time it was all in flames (sawdust). The heating element was red hot. After a brief pause, I decided to switch the sawdust out with the type that I use myself (coarser type). As soon as there was a good amount of smoke the electric regulator was set at 2 and the temperature in the smoker kept between 70°C and 80°C. Unfortunately, sawdust tray is too small to do the smoking in more than 1 hour, so we had to empty the tray and refill it. However, it is possible to make a new, larger tray so you can get up to 2 to 3 hours of smoking. 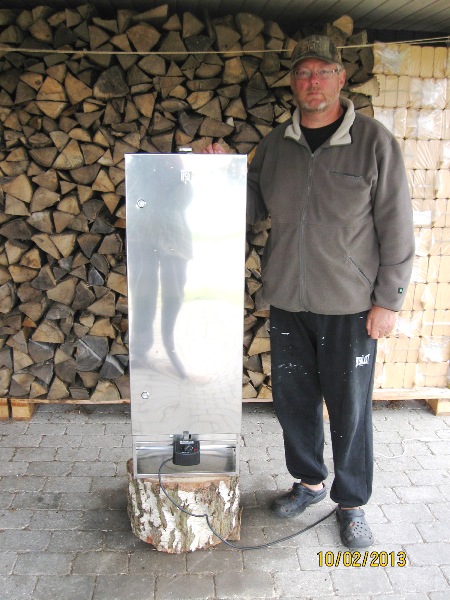
One of the many smoke ovens from Peetz 530 The herring were smoked for 1 hour with the use of electricity. The next hour the smoker was running without electricity and the temperature could remain at 65°C. After 2 ˝ hours the herrings were ready for a meal "Sun over Gudhjem" . The herrings did not opened enough in the belly, but it is probably due to the initial problems we had with switching sawdust. The temperature should be 90°C the first 15 minutes, then the belly will open up and there will be more smoke flavor into the fish. But all in all, I think it is a solid and useful smoker that you can get a lot of pleasure from. However, the smoking tray is too small. You can find the German company here Peetz oHG. They have many types, but the one Dan bought is the Peetz 530 Art. No. 530015. The manufacturer states that you can both hot smoke and cold smoke. Up to 27 fish vertical or horizontal placement. 12 eels can be hung vertically. The smoker can be heated with barbecue coal in the supplied tray (Glutkasten), or electricity. (Heater 2300W) or gas (Gas burner 4200W), these are extra accessories. NB: The model has been discontinued, but there are several new ones in stock. Look for a model with automatic temperature control and not one with time control. 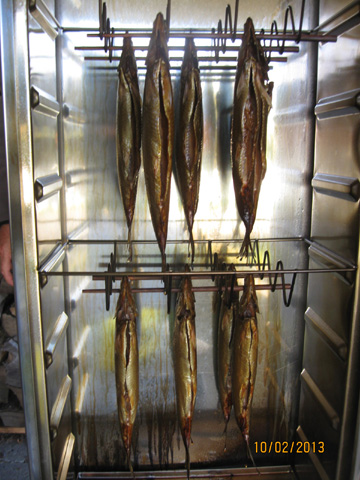
The herrings were smoked for 2 hours and 30 minutes The manufacturer has on its website a manual, but it is in German so here is a translation into Danish and English. |
Back to the page where you came from.

one.com |