A smokehouse is a place to smoke commercial foods.
|
I am writing this page in English with Google translator. Click the Danish version and see the original Danish website.
|
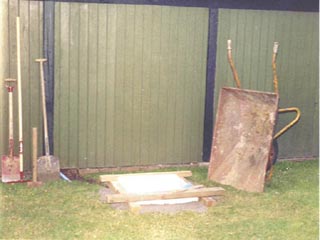
The new outdoor kitchen under roof |
The desire to build a functioning Smoking Oven has existed for many years. When I read Peter Svendsen's article, "The best Smoking Oven you build yourself" in the magazine Do it yourself = Gřr det selv from the 8 / 2002 24. May, was not far from idea to action. This article was first put into the magazine No. 8 / 1989, so it must be said that the man was ahead of its time. Are you in favor of the magazine's website requires a subscription number to get on with the search. You can log in using your 10-digit subscriber number as username and your postcode as your password.
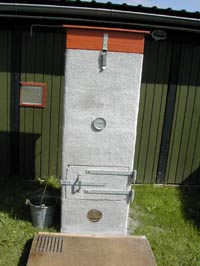
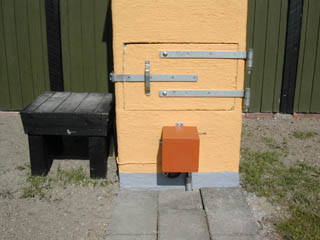
I have in many respects followed the instructions in the magazine, but I have chosen the Smoking Oven must remain on site and no smoke must come out of the joints. Therefore Isokern chimney capes also fastened with mortar. The oven must be electronically temperature controlled, so I can smoke in both summer and winter with minimum effort. |
|
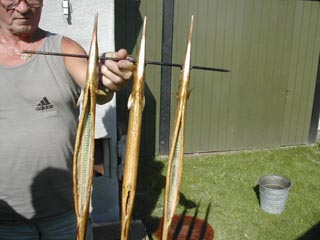
The left side fastened the buckle and handle. Before buckle mounted on the gate sawed in a vinlel at 45 ° thoroughly as described in the article. Doing it this way, you secure a good result, and there are more in control of things. I have chosen to build the oven with 5 Isokern chimney capes when the big trout and salmon also be smoked in the oven, not to mention the large silver eels and giant garfish, which comes in the autumn.
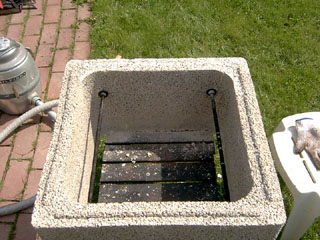
The oven is plastered with a thin layer of mortar inside, so it must be done now that the first two Isokern chimney capes are installed. The next three Isokern chimney capes fitted and plastered as they built up. It is very dusty to file in pumice concrete, so use a face mask. |
See here what Autostitch can do with panoramic photos |
|
The "Hat" attached accordance with the instructions in the article, but I have chosen for safety reasons to put two brackets on the lid, as it is relatively heavy.
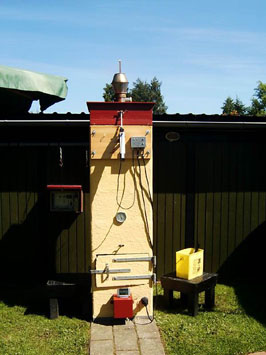
I have plastered the outside of the Smoking Oven with a thin layer of mortar for several reasons. Isokern chimney caps are very fragile, they do not tolerate pressure on the sides. They are very porous and absorbs water to be vaporized by heating. It requires energy. They are not very pretty to look at in the garden. Later I intend to paint the smoke ovnen exterior so that it falls well into the garden environment, or perhaps in a color highlighting the smoke ovnen. Paint interior is anathema. I used a large lime brush and a thick gruel of cement and mortar for the exterior plaster. There is mounted a bimetal thermometer 55 cm below the front. It is the product of Rüeger and goes from 0 to 120 °C. Purchased from a plumbing installer. The valve is made of stainless steel and bought a chandlers trade. Temperature Control Panel is built into the carport wall, then all the cables enter the box from the back. |
Second picture Easter 2003 |
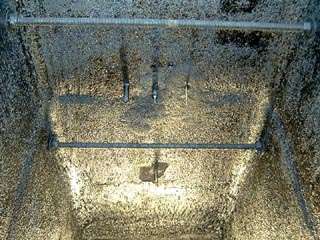
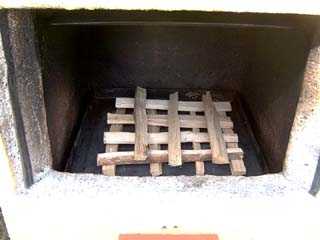
Bottom wood dust tray with attached heating element and cover plate |
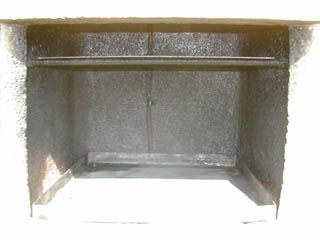
A security plate is needed. It will pick up the pieces, which detaches itself from the suspension by accident during the smoking process and prevent them from plunging into the wood dust and destroyed. My security plate 39x39 cm is made from 1.4 mm stainless steel, it gives approx. 3 cm air around the plate so that the smoke and heat may come up in the smoke chamber.
My wood dust tray of 40x40x5 cm with heaters and bottom plate resting on the bottom two threaded rods. Wood dust tray is made from 1.4 mm stainless steel, with 5 cm high edges. Under this is fitted with two heating elements in series for 230V and 3000W from a KGK fan heater. Each with a resistance of 17 ohms. As spacers were used 6 mm threaded rods cut to 7 cm in length and each equipped with 4 nuts, washers and spring washers. You can see the new wood dust tray with the new heaters by "clicking here". Remember earth connection to the plate with minimum 4-mm screw, tooth washer and lock nut. Heating elements for air heating see: JEVI A/S. |
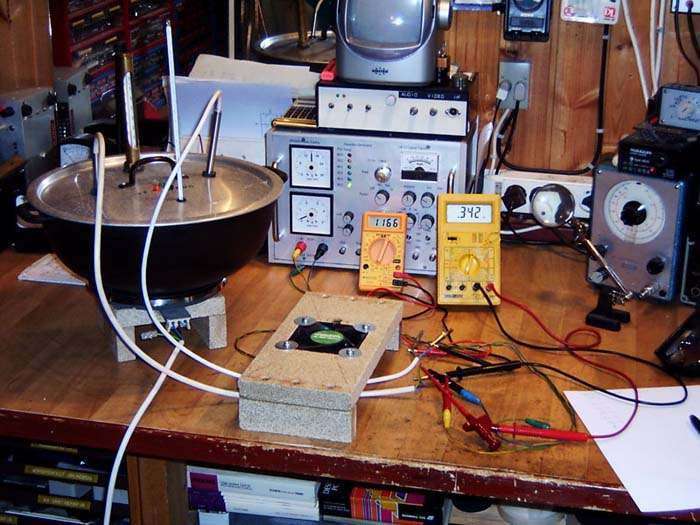
Now the Smoking Oven fitted with a heating element and electronics for controlling the temperature and air flow |
|
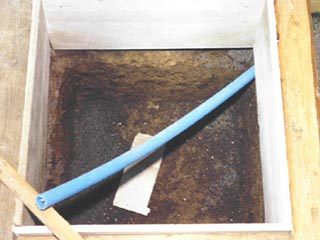
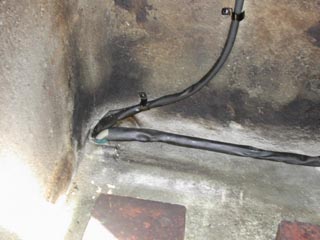
Through the blue PVC tube pulled the following cables: An installation cable 3x1,5 square with protection earth for 230VAC to the heating element. A control cable to the electronics with three wire for the signal transfer from the temperature sensor LM35DZ. A control cable to the electronics with two wire to the NTC resistor. A 12VDC supply cable to the fan in the box. And a temperature sensor from a digital indoor/outdoor thermometer if you think there is a need for this. Check that all cables can be in the tube before you begin. One 1/2" water pipes embedded in the bottom of the oven, so any water can escape.
Postscript: In the picture to the right the steering cables to LM35DZ temperature sensor and NTC resistor go vertically up the inside of the smoke ovnen. That has now changed. The cables leave the smoke ovnen right down to the bottom and vertically up on the outside of the back wall. They are now protected from heat and mechanical wear from wood dust tray and security plate. The fan on the bottom, originally from a PC, is now replaced with a 230VAC version. |
The fans at the bottom |
for protection against radiant heat |
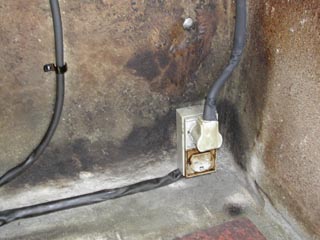
At the bottom mounted an outlet with earth, and the sensor from a digital thermometer placed inside the house of the sockets. Outlet with earth are now mounted horizontally right down at the bottom to allow more room for the new wood dust tray. LM35DZ temperature sensor, NTC resistor and the spear to the wireless thermometer are placed on the back wall 120 cm up from the bottom. On the outside of the back wall mounted waterproof electricity sockets for cable connection. It is necessary if one or more sensor must be replaced at a later date. See pictures below. All cables inside the oven is drawn in "Black Heat Shrink" tubes that are resistant to at least 135 °C. The picture to the left.
A 40x25 cm Skamol plate positioned oblique front wall socket, so that protection against radiant heat. The digital thermometer measures temperature in outlet and this is about 40 °C lower than the temperature in the smoke chamber. The highest I have achieved in the Smoking Oven is 90 °C. and 50 °C outlet. |
|
If you want a constant air current in the Smoking Oven with uniform smoke development, we must regulate the valve and the "Hat" depending on the wind blows. It can be made more "clever" by mounting a temperature controlled fan in front of the valve in a small box, and mount an adjustable shutoff damper and Jet Hood in the "Hat".
The blower is a 12VDC fan from a discarded PC. Be aware of the power they work with - they exist between 120mA - 170mA. It works between 15V and 5V. By starting with a temperature of 15 °C, the fan gets 15V and the voltage decreases almost linear to 5V at 70 °C, where it stops. It is coupled to temperature control unit, so there are both automatic and manual control of the operation. Want to see the calculations on the voltage regulation "Click here". |
and a bimetal Rüger thermometer |

Then there is lit up in Smoking Oven |
Shutoff damper may further be fitted with an on/off reversible motor so that aeration is adjustable. The damper closes, however, not quite tight, there are approx. 6% opening of closed dampers. It does seem very satisfactory.
Then there is lit up in the Smoking Oven. The sawdust tray contains approx. 5 l of sawdust. 1 l beech sawdust weighs 270 g by way of purchase (8% water content). The mixture of sawdust found elsewhere on the page. There are 1 dl poured alcohol on the front edge of sawdust and lit up with a match, which just thrown on the sawdust, so avoid being burned. After a minute or so the gate closed, then there is "pep" in the sawdust. Postscript: I do not think it would be a good idea to mount a reversible motor because the damper "sooted" after many smoking. The engine can not manage to turn the damper. In addition, water vapor must also getting out of smoke ovnen, because otherwise the fish is just cooked. |
|
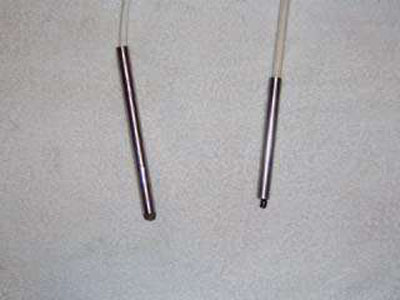
The image to the right shows the four temperature sensor, which I have used. Top from left are NTC resistor, LM35DZ temperature sensor and spear to the wireless thermometer. Bottom LM35DZ an additional temperature sensor. These are mounted respectively 27 cm and 55 cm from the top.
Postscript: These temperature sensor location is subsequently changed as the Smoking Oven got an extra Isokern element on top. All 3 temperature sensors are now sitting 120 cm from the bottom. If you want to use two LM35DZ temperature sensor for different reasons - one in reserve, or switch between two heights in Smoking Oven - these must be fitted with a switch on this way. Use no more. Sensors embedded in a 10 mm stainless steel tube. The body of the sensors - NTC resistor and LM35DZ - sticking right out of the tube which is filled with a 2-component epoxy. Do not use the one called "Super Quick" to the pipe, the hardening of 90 sec. Super Quick can be used for a layer on the sensors, so they are protected from aggressive smoking environment. |
Oven and at the back two junction boxes |
Version 1 then version 2 however, without text |
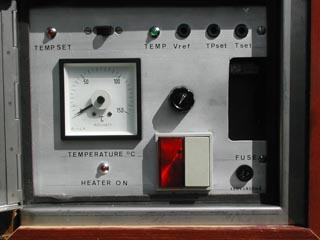
Control panels are seen here on the left is version 1 and 2. These were built into a stainless steel cabinet with lock, as they sat outdoors. The instrument indicates the preset temperature and actual temperature in Smoking Oven using the slide switch just above. Temperature setting made with the center button. Master switch found underneath. Moreover, access to the main fuse and trimmerpotentiometer from the front panel. The three LEDs indicate the set temperature, actual temperature and the heating element is connected. Moreover, the master switch with red glimlamp which shows that there is power on the system. A red lamp visible from my office in the house, mounted on my garage. It shows that the heater is "On".
Version 1 and version 2 are no longer used, have been replaced with version 3 |
|
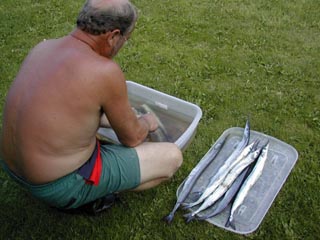
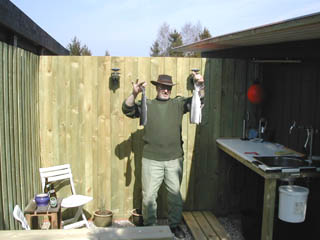
Over the years there have been many new things, it fixes to improve Smoking Oven and of course new developments, so Smoking Oven could be optimized. On the first image seen Smoking Oven in 2002, where it has just been completed for the first smoking of herring and garfish, which Mogens had caught in his nets. I must say that I had some teething problems initially, so I had to install an adjustable shutoff valves and Jet Hood in the "Hat". Shutoff valves and Jet Hood was mounted, and the extra money was well spent, you can really control the smoke. Cost was approx. 650.00 kr.
Later I found out that Smoking Oven was too short for eels as a Isokern chimney cap came on. These chimney caps must have some protection for wind and weather, or they cracks in the long run. I stumbled over a good offer on tiles of good quality, so therefore had the Smoking Oven to be covered with these. The "Hat" was also rebuilt. The roof was not more nearly horizontal, but shaped like a pyramid. Now there's no dripping from condensation on the fish. |
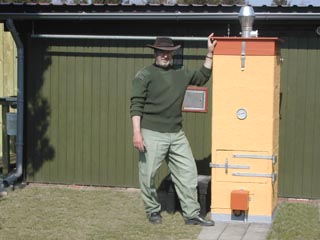
Top picture is from 2002 Bottom picture is from 2008 |
I just cleaned 4 rainbows from Karlstrup P and T |

 Here I can give good advice, buy at Saxo or borrow these books at the library: Kringelbach salt and smoke book and Preben Madsen salting and smoking. You can find many really good recipes. Go down and find these books at Saxo engine and purchase them via e-mail. It's fast and cheap.
|
Why salted and smoked food?
|
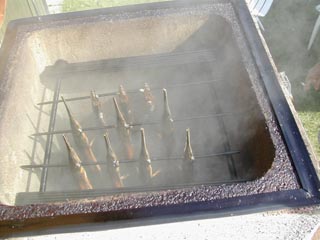
The first look down to the garfish after 1 hour of smoke. We had some small teething problems in getting enough smoke. Wood dust, which was coarse approx. 7 mm, were bought from a sawmill, but was not suited for smoke. It should be noted that I used then a cast iron pan and a stove for heating.
The setting of the valve, I must first learn to know, before the results are quite satisfactory. There was no trouble keeping a temperature of 75 °C. The fish was smoked for 3 to 4 hours, which Mogens seems too long. This size garfish and herring must have only 2 to 3 hours at a temperature of 65 °C. Start temperature 80 °C. in 20 to 30 minutes. The picture under the garfish is silver eels, which were smoked for 4 hours following the recipe found elsewhere on the website. |
|

Block diagram of Temperature Controller for control of the smoke temperature
|
Component selection is based on what I had lying in the drawer, and the purchase of inexpensive standard components. Chosen a temperature sensor LM35DZ that goes from 0 °C to 100 °C and gives 10mV/°C output. So it gives an output voltage between 0 V and 1 V of that temperature range. Output voltage amplifier 10 times in an OP Amplifier LM324 prior to entering into an LM339 Comparator with hysteresi circuit.
Comparator has in the input a 2x6 switch, so there may be set 6 different temperature ranges of your own choice also called Vref. I selected the range from 30 °C to 80 °C. Hysteresi function is achieved by a feedback loop from output to + input. Chosen a delta temperature of 1 °C to 5 °C. Delta temperature setting to be performed by P1. LM339 comparator controls the transistor 2N2222A "On" "OFF" function. When the transistor 2N2222A is "On", is the relay RLY1 pulled and there is power on the heater and the red light. Hysteresi function is chosen as the relay is not "clapping", it can destroy the relay platinum. In this setting, no adjustments to be made, since the temperature range is determined by voltage divider R6/R11 and R12/R17. But the values of the resistors must be followed and these resistors are metal film 1%. The temperature read on a display LDP140LCD which cost approx. 120 kr. It should be noted that this display must have its own power supply, which in no way must have the same ground point as the temperature control circuit. Therefore, the display also has its own transformer TR2. |

Complete diagram of Temperature Controller can be found here |
Relay Switch Actuator for the EURO 1
|
Component selection is again based on what I had lying in the drawer, and the purchase of inexpensive standard components. The actuator has 3 connections: blue for neutral, Brown for phase (up) and Black for phase (down). Shifting phase between brown and black, running toothed rack up and down. Using relay RLY1 it can be very easy to change phase. There is a connection to a control voltage to Vin at 0 V (Low) and 10 V (High). When Vin is 0 V Q1 off, and at 10 V Q1 on. The relay shall operate in step with heating element, so that the "hat" is down when the heater is on and the "hat" is up when the heater is turned off. Control voltage coming from the Temperature Controller IC LM339 Pin 2.
Here is an example: The temperature is set to 70 °C and the temperature in the oven is 60 °C. At IC LM339 Pin 2 is the voltage "High", the heater is "On", "hat" is down because Q1 is "On", and RLY1 is dragged phase on black. The switches S1 and S2 are used to Auto/Manual operation Up/Down and On/Off. PCBs and cabinet available here. Do you use a 12 volt transformer and a 7812 controller, do not use R3. R5 and R6 are changed to 1.2K ohms. But remember that there should be about 3 volts over a voltage regulator, so maybe it can be omitted because the circuit is not critical for small voltage variations. |
The new temperature transmitter & receiver
|
In autumn and especially up to Christmas I and my Fishing's friends smoke many eels, and it becomes dark early. So it irritates me that I can not see the temperature from my office. I have therefore worked to transform the output signal from the temperature sensor 10VDC at 100 °C to a frequency of 10 KHz at 100 °C and send the signal through the mains into a receiver in my office. This project was implemented with great satisfaction, but the cost was beyond.
You can now buy a wireless thermometer in the grocery store around 130 kr. on offer. It has a range of 25 meters in open air, and covers an area from -40 °C to +200 °C. There is also a High/Low alarm temperature setting or an indoor temperatures readings. Can be converted to °C or °F. Irrelevant to us in Denmark. The sensor is a spear so that it can be inserted into the roast and the temperature can be measured in charcoal grill or in oven. A good buy, but remember not suitable for microwave. I have built a 10 mm tubes into the Smoking Oven next to the other temperature sensor, and here I just stick the new spear in. The transmitter can not be installed permanently, as it does not tolerate rain water. Use 5 pcs. AAA alkaline batteries in 6 months. |
|
Diagram of the temperature dependent fan
and Calculation of voltage regulation of Fan |
I have created a temperature dependent fan control for intake of air. The reason is that I want to control smoke and heat from the embers of sawdust regardless from where the wind comes. Is the wind blowing from south-west it comes straight into the valve and the sawdust glow more up. However, when the wind comes from north-east, there is almost no draft in the Smoking Oven. The reason is that the Smoking Oven is sheltered by the carport.
With the switch S1 it is able to provide fans with power (On / Off). The new PSU for temperature-dependent fan control is built into version 3 "Temperature Controller". The fan is built in a small cubic box of 16 cm of water resistant plywood and mounted over the hole where the valve was. Drawing of the box with air intakes is seen here. At the bottom of the box is drilled holes for air intake. Voltage to the ventilator is regulated by a LM317 from 5V to 15V depending on the temperature. NTC resistor is embedded in a 10 mm steel tubes filled with two-component adhesives, and in the smoke chamber positioned adjacent to the second temperature sensor LM35DZ. When starting at 15 ° C, the fan gets 15V and 70 ° C 5V, where the fan can not run anymore. The fan is from a scrapped PC with nominal voltage of 12V and a current of 170 mA. The original valve in the oven is now removed. |
A new 230 VAC fan is installed in the bottom of the Smoking Oven. NTC and LM35DZ probes into steel tubes

|
I try to do forced air flow inside Smoking Oven from bottom to top. It is to get water vapor out as quick as possible and to get an even distribution of heat from the eel's tail to the eel's head. When I mention eel, it's because I've smoked eel at 87 cm, and the length between security plate and top is 90 cm with my 5 element Smoking Oven. The oven is now extended by one more element (30 cm), so the tails of eels will not be so burned any more.
At the bottom of the oven is placed a 230 VAC fan from Harald Nyborg. It's a fan from a Heatmax heat gun, which is taken out and used. The price of the whole heat gun was as cheap as if you only had to buy a new fan. |
|
Temperature Controller with built-in hysteresis in LM339 Comparator
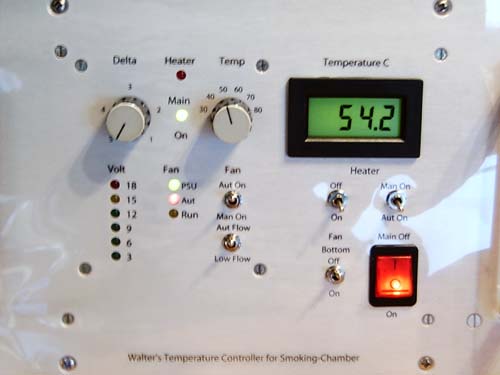
Frontpanel for version 3 "Temperature Controller for Smoking-Chamber" |
||||||||||||||||||||||||||||||||||||||||||
|
As the experience comes with my Smoking Oven, I try to constantly come up with new ideas to simplify the working process. A better and perhaps also a cheaper version of the temperature controllers with a temperature controlled fan is a requirement. Latest news is a "Linear Actuator" to open and close the "Hat".
To meet these requirements, I must return to the "Relay solution" and create an electrical circuit with a Comparator with built-in hysteresis. Therefore I have made a new design of an advanced temperature control, adjustable to turning in a variable temperature range. There are 6 variable regions from 30 °C to 80 °C. The six areas cover the following intevaller:
Delta temperature can be adjusted with potentiometer P1 from approx. 6 °C to 1 °C around the average temperature in that area. The table above shows the 6 areas with Delta potentiometer P1 set to 5. You can then read when the heater shuts off and turns on. In the region 30 °C the heater shuts off at 32 °C and turns on again at 27 °C. It is this feature called hysteresis. Delta potentiometer P1 set to 1, the heater turns off at 28 °C and turns on at 27 °C. But be careful not to go too far down, so the relay can begin to "clap" because the hysteresi function is too small. I never go below 2 ˝, so there is no problem.
A temperature table can be found here. It is expected that the diagram and PCB film with material BOM will be available in autumn 2004, when it is tested in practice. Whole lot can be built into a Safety Box from Harald Nyborg with product numbers 3674 at 178.00 kr. or Bilka at 179.00 kr. Rates are from week 24 year 2004. Safety Box seen below in an image sequence of workshop pictures. The diagram is a complete circuit of the LM339 with hysteresis for regulating temperature in Smoking Oven and circuits for temperature controlled fan management. The temperature is displayed on a 13 mm LCD display with background light. Fan output voltage to be observed on a 6 pcs. LED voltmeter from 3 volts to 18 volts. Schematic and PCB lay out is now ready-made and the circuit is now being assembled and tested in practice. In late June 2004, the circuit is now "running" for a week with surprisingly good results. Precise on/off switching of the relay at the set temperature. No arc in the relay, which can destroy it. Delta temperature value is accurate throughout, a very practical choice from approx. 1 °C to approx. 6 °C. The facilities coming on the PCB with dimensions 200x150 mm, are: Temperature control in 6 steps with hysteresis (delta temperature) and temperature controlled fan-driven in two ways. One via temperature controllers, ie On/Off with it. The second through the relay to supply its own mains, so there may be "cold smoked" without the heater on. I would not claim it is cold smoked salmon at 27 °C. But we'll see. Yes! just look here. I come with more descriptions and pictures as they are completed and have time to do so - there must also be fished. If you have not seen my "little" workshop in TV Lorry, I would like to show it here so you can see where the electronics and mechanics are manufactured. It is not a chipboard which cooktop and fan are mounted, but a Skamol plate. My homemade light box, as seen in one of the pictures are in a chipboard box. |
||||||||||||||||||||||||||||||||||||||||||
The new "Temperature Regulator with built-in hysteresis" can be built into the Safety Box from Harald Nyborg to 178.00 kr. |
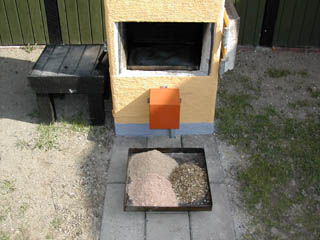
How to smoke with spice-sawdust
Just something to eels |
My sawdust tray can contain 5 liters sawdust, and smoke time is now with the new measures 4 hours at 60 °C to 70 °C with good, constant smoke. The mixture of sawdust, which I use to fish, is composed of 1 part Juniper sawdust, 2 parts alder sawdust and 3 parts beech sawdust.
The mixture is distributed evenly in the tray and pat "a little firm" with your hand. One dl alcohol distributed along the front edge of sawdust and ignited immediately. The temperature in Smoking Oven - here in the winter of minus 5 degrees Celsius - rose to 50 °C in less than 5 minutes. After approx. 30 minutes the temperature stabilized at 70 °C and the smoke was good progress. Here are 17 eels with a total weight of 11 kg. They were smoked in 5 hours and cool 1 hour in Smoking Oven, after which they were wrapped in Roll-Easy frostbox paper and put in refrigerator overnight. |
|
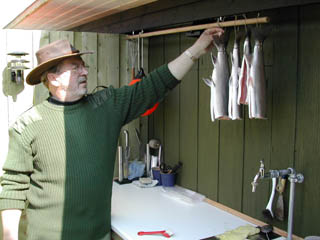
The fish swiftly hanged in the Smoking Oven, so the temperature does not fall too much. Selected the temperature on the Temperature Control Unit, and it will remain stable at this temperature. Do I have to smoke for a long time, I have to refill with sawdust.
A good advice, as recommended in winter, is: When the fish have finished smoking, turn off the power, open the "Hat" a little and close the valve. Let the fish "sleep" in the Smoking Oven to the next day. Juice smoky taste is accumulating in fish, and it is very firm in the flesh. Tested on eel, cod roe and trout. The advice can not be recommended during the summer with temperatures of 20 °C. |
|


|
Want to read more about fish recipes, please visit the "Smoking Oven's Friends". Click icon to the left, you will come to their website.
|
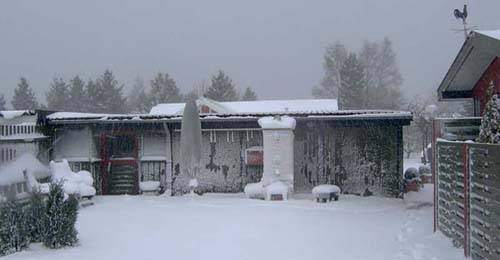
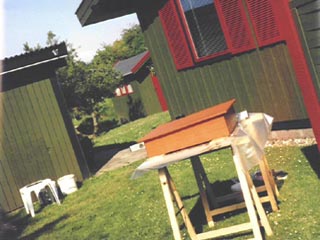
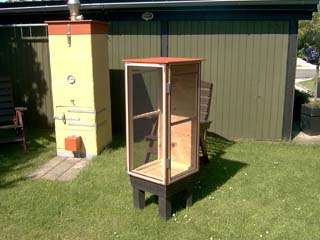
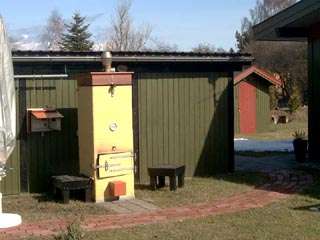
The new covered outdoor kitchen completed in November 2004
Outdoor-kitchen is now with sliding door |
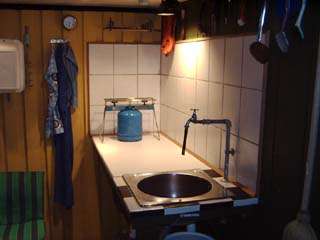
My amazing and beautiful outdoor kitchen was completed in autumn 2003. When we came to winter in December 2003, it was often too cold, rainy, with sleet and snow, and otherwise what came from above to stand there and clean the fish. I therefore chose to make my outdoor kitchen covered, so at least I could be there in the "wet weather" and in the shadow of the wind. It gave me something by summer 2004 to go with.
Further, I would also improve the possibility of a lighter and more hygienic cleaning of the kitchen. I therefore made the tiles above the table. Lighting and Spot above the table would of course also be mounted in the ceiling. Furthermore, there is a light panel in the middle of the ceiling. A short wall at 1 meter with a window set in front to protect the refrigerator, microwave and freezer to drifting snow. Now I have every opportunity to grill and use my little Smoking Oven for small portions on camping gas, even in winter. |
|
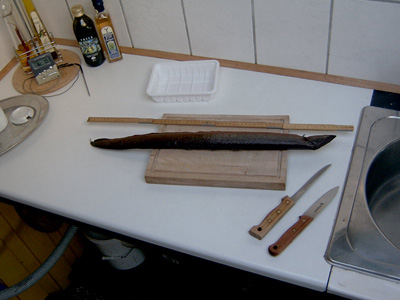
Here I show how to pills smoked eel, so it looks good on a piece of bread. Cut the head first and remember the knife must be sharp. Measure the eel and cut so many pieces of 6 cm to 8 cm in length. The last piece of the tail given to the cat. Cut along the backbones the upper side of the eel. Cut along the backbones the under side of the eel. Cut the skin off of both pieces of eel. Trimmings of the fillets for eel-skin and bones which are "sticking" must be done.
The large eel that was used here was 63 cm and weighed 400 grams after smoking. I got 5 good pieces of eel, and the tail to the cat. In this way, you always get nice pieces of eel, but remember to use a very sharp knife and the eel is best to cut at refrigerator temperature. The bread with eel garnish with scrambled eggs, chives, seasoned with white pepper. Remember to taste the eel before salting. |
Go to a printer friendly printout |
Nice smoke comes out of Jet Hood |
When the outdoor kitchen was finished, I had to build a walkway to this because the grass would be worn down with all 'the traffic. Not to mention the footwear when the winter comes with snow and sleet.
The new temperature controller was also installed and tested under real conditions. It has really been good. Eels, garfish and sea trout have been smoked. The thermometer shows a temperature of 28 ° C in a 3 kg. trout to be hot smoked. I fell one day over an inexpensive thermometer in Favřr to 50.00 kr. and would of course test this. The first test was in a hot-smoked trout around 3 kg. The fish were filleted and the sensor is stuck into the thick end. After 3 ˝ hours the fish was finished and the final temperature of the fish was 41 °C. I must come with a complete recipe for the process and a recipe for serving the fish, because it is a heavenly meal. |
Here is the news: cold-smoke salmon and trout in my Smoking Oven
|
Now it was time to test my Smoking Oven to "cold-smoke". I had a big rainbow trout of 3 kg in the freezer, which was suitable for a test. Weather, 23 March 2006 was perfect, high pressure, high sunshine, little wind and about 0 to 5 °C. The fish was split and placed in salt (3/4) and sugar (1/4) one day before. The trout "stayed" in the fridge, because there was minus 5 °C outside at night. Smoking Oven was made ready in the morning with a 5 cm thick layer sawdust and along the front edge was poured 1 dl of alcohol. The alcohol was ignited with the gate ajar and the "Hat" completely open. After approx. 30 minutes, there was good fire in the sawdust and the fire was "strangled" with a new thin layer of beech sawdust. By adjusting the gate and the "Hat" I could maintain the temperature between 25 °C and 30 °C. It should be noted that I did not use electricity.
The fish came in at 09:00AM, after it was washed clean of salt and side legs cut off. The fish were then smoked at 27 °C until 17:00PM. I refilled a few times with a thin layer of sawdust. The temperature was adjusted using the gate and the "Hat", so you should watch the fish all the time. The results seen in the lower image to the left. Delicious! See also cold smoked salmon. |
Click for drawing |
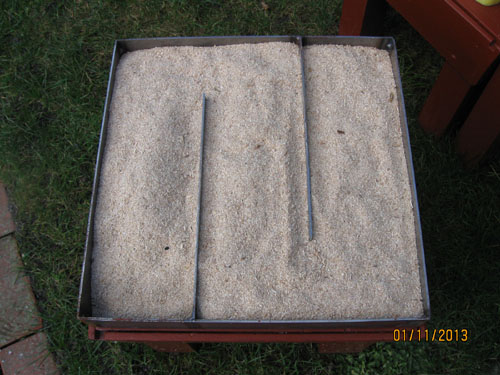
I am trying out a maze sawdust tray of 42x42x6 cm for cold smoking. The reason is to prevent fire in the access of too much sawdust so that the heat becomes too high. With this control it should be possible to cold smoke with an air temperature up to 15 ° C. The result will appear later, when available. See below.
The new maze sawdust tray is seen on the left, and a drawing for making the labyrinth sawdust tray is available by clicking below the image. At the bottom left of the tray in front, the sawdust is ignited with alcohol, and the embers propagate back and forth in the maze to finally end on the right. When the fire is to be lit on the left side, it is because the door opens from the left and thus gives draft in the oven from here. The tray is filled with sawdust approx. 8 liters or approx. 2.2 kg, but only up to 1 cm from the top edge, so that the embers do not spread over the labyrinth separation. I tried to cold smoke a trout of 2.5 kg, and the test ended with a good result for my Swedish sea trout. The smoking time was over 24 hours for the new sawdust tray, and the right compartment was not yet completely burned through after 24 hours. See the drawing and the combustion by clicking below the picture. Result: The oven was switched on on Friday at 12.00 and kl. At 12.30 the temperature had stabilized at 12 ° C. The outside temperature was 2 to 3 ° C at that time. The rest of the day and throughout the night the temperature in the oven dropped to 7 ° C, where it remained until the next day at. 14.00, although at night the temperature dropped to -2 ° C. |
|
After I have tried a cold smoked trout and particularly with very good result, I naturally think of something new, so I do not have to run back and forth and shut up and down for this "Hat".
I have found a reversible motor of the brand Mingardi Magnetic EURO type 1, which is used in large greenhouses to open and close the windows. The engine, actually called "Linear Actuator", is for 230 VAC and can lift with a force of 450 Newtons. Converted into common parlance, this amounts to 45 kp. I am missing only the control electronics, but I do it of course myself. My starting point is an up/down motion of 20 cm, which must be limited to 5 cm or 10 cm and a variable temperature control between 20 °C and 80 °C. The "Hat" can be pulled with a force of 10 kp, which converted in my head is 100 Newton. So there is excess power available. (1 kp is equal to the weight of a 1 kg appeared at 45 ° north latitude and equal to 9.81 Newtons). Further info available on the "Temperatur kontrol for rřgovn". (Only in Danish). |
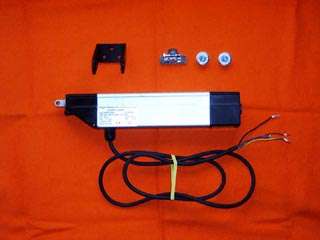
Linećr aktuatorer |
|
I have considered very carefully how I should make my temperature control for this "Actuator". Should I make a whole new temperature control, or should I just connect the "actuator" on the existing "Temperature Controller". I chose to make a new in order to test the whole lot. Here after, I could then decide for myself what was best. The result was - until now - that I connect the actuator to the existing "Temperature Controller". I take control signal from the LM339 pin 2, lead the signal from the box to the front of the Smoking Oven. Here I connect a relay switch. This relay switch is built into the box. See the left image. Another 'problem' to be solved was, the "actuator" could not be mounted outdoors, as it can not withstand rain, but only slightly damp weather. Therefore it was mounted on a 28 mm wooden board with the electronics. The electronics is mounted in a Teko Alutek AL12X box with the following measurements 139.7x101.6x76 mm. Whole lot can then be mounted on 4 pcs. expansion bolts 10x100 mm with wing nuts, when it is used. The signal is taken from the 7 pin trailer connector that is mounted at the bottom of Smoking Oven, then connect the 230 VAC and the actuator is "running".
Notice the red light in the background. When this is turned off, the temperature in the Smoking Oven is above the preset temperature, and the "Hat" goes up. When the temperature falls below the preset temperature, turns the heater on and the "Hat" goes down. |
An extra Isokern chimney cap on the Smoking Oven
|
In a long time it has annoyed me to see the big eel tails easily burned, because they came too close to the heat. Even a security plate can't avoid the heat curly the tails in the beginning, where the heat must be high. I therefore decided to extend the Smoking Oven with an extra Isokern chimney cap. It is not particularly difficult, but the "Hat" should of. The mounting bracket of the actuator must be renewed with 4 new expansion bolts. Be careful with expansion bolts in the elements, they must be screwed in with a loose hand, otherwise the material cracks. Fill the hole up with fast-drying epoxy so that the bolts stuck. A cheaper option is a 10 mm threaded rod in a 12 mm hole filled with fast-drying epoxy. Now that the "Hat" was down anyway, I might as well raise the bottom frame with 5 cm. Then hits the beak of garfish not on the "Hat's" inner lid.
The two lower threaded rods were moved into the new top. The 4 feather in the item was removed and the top sanded smooth before it came into place. The new element was fastened with tile adhesive and must also be plastered like the "old" Smoking Oven. The 3 cm wide rubber band renewed and glued with contact glue on the new element. The "Hat" put in place and the hinges are screwed in the new element. Sealing tape put on the new base frame. So there is room for the large eels in the autumn. |
|
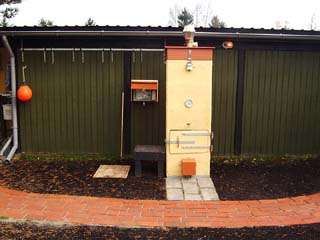
Smoking Oven is now tiled |
Smoking Oven is now ready and equipped with an extra Isokern chimney cap. Plastered inside and outside, and painted in the yellow color. The "Hat" and the actuator is also mounted, and now there are fired up, so the new parts may take the color and have a "taste of smoke" before I start on the eels.
I have tried to cold smoke a homemade cheese which would like to become a real "Rygeost". There was fired up in the sawdust with a little alcohol, and the temperature stabilized at 30 °C for 1 hour with relatively good smoke. The heater was not turned on. After 2 hours I took the "Smoking cheese" out and it tasted wonderful. Not much sawdust was used and the smoke development continued with a temperature of 30 ° C, so I decided to hang two trout sides in the oven overnight. We'll see how they turn out. As on the image of: The perfect cold-smoked trout above. If the fish is to be really good, it should weigh at least 4 kg. Smaller fish get a little dry. Latest news here in the spring of 2009 is that I have tiled the Smoking Oven. I think it is a good thing, because the chimney capes can not suck water and thus crack in freezing weather. We'll see. [Silver eel] [Salmon and Trout] [Garfish] [Herring] [Mackerel] [cod roe] [Smoked cheese] |
The new hat with sloping sides
|
There are many of my friends and fishing companions, who says I never will finish my Smoking Oven. It is probably true, since I still continue to make improvements. I want to create a new "Hat", which has sloping sides up to Jet Hood. The reason is condensation. On a flat, horizontal ceiling is allocated more condensation than on an inclined ceiling. Should there be water droplets on the sloping ceiling, they will probably run down the sides and drip out at the edge where there are no fish hanging.
The image on the right shows the new "Hat" made of 15 mm water-resistant X-veneer - purchased from Linĺ - with measurments 1220x800mm to DKR 157.00 plus VAT and any delivery DKR. 90.00. When the "Hat" is ready made, it must be painted and fitted with dampers and Jet Hood. I shall come up with more pictures. The drawings you can see here, so you can make your own "Hat". The four aluminum corners are put on to strengthen the "Hat". There are also self-adhesive aluminum tape, which can be used. The purpose is only to prevent water entering the joints. I have purchased some crystal clear polyethylene tube folie at 90 my for packing of smoked eel. With a suitable welding apparatus, it is now possible to weld the bags airtight. The air can also be sucked out of the tube, but I've heard from an old cook, it should not be done with smoked eel. The meat on the outside of the eel may become black, which is seen when skin is taken away. It is somewhat cosmetic, which should not affect the taste. Naturally I would try this before I get started with this vacuum. See also the Filleting of smoked eel. Keep the "mouse" over pictures to the right, then they stand still, and you have the opportunity for a closer inspection. |
Model of the "Hat" made of soft masonite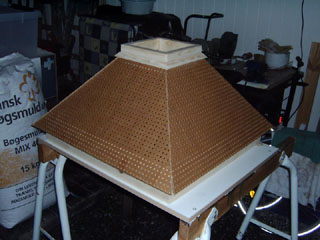
The first model of the "Hat" I have made in soft masonite, so I could form some idea of how the "Hat" would look like.
The "Hat" made of 15 mm water-resistant X-veneer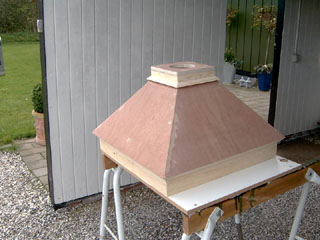
Here is the "Hat" made of 15 mm water-resistant X-veneer. Nail and screw holes filled with plastic wood, and made smooth with sandpaper. Ready to first time painting. I've been using ubiquity, Swedish Red trćfix from jem & fix.
The "Hat" is painted and the corners are reinforced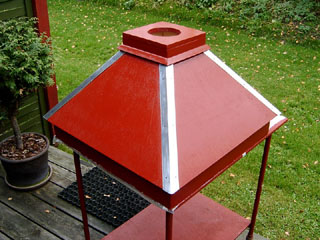
The corners are reinforced with 0.6 mm aluminum rails, bought in Bauhaus for DKR 80.00. The rails must naturally be adjusted the "Hat". You can easily cut them into shape with a shears. Glued with contact glue and each have 6 pieces blue nails. There are also self-adhesive aluminum tape, which will surely do as much good. The purpose is only to prevent water entering the joints.
The "Hat" mounted on Smoking Oven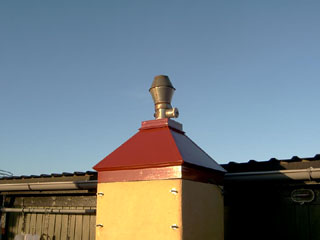
The "Hat" is fitted with the old hinges and of course the old Jet Hood with dampers.
The actuator is mounted on the Smoking Oven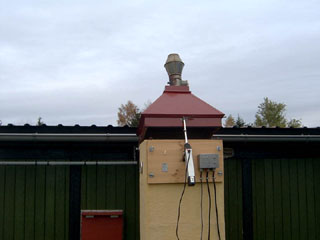
The actuator is mounted on the Smoking Oven. The opening is now larger than before because of the bracket sits farther down. Should it be changed, the actuator must be moved farther down the board. We'll see. The location is OK.
Here is the first eel smoked with the new "Hat"
The first eel smoked in the new "Hat" was smoked a day with a huge low pressure with strong gales and rain. The rain fell directly into the Jet Hoodn and gave black stripes on two eels. Apart from this, all eel was perfectly smoked. A new evaluation must occur at a different and better time.
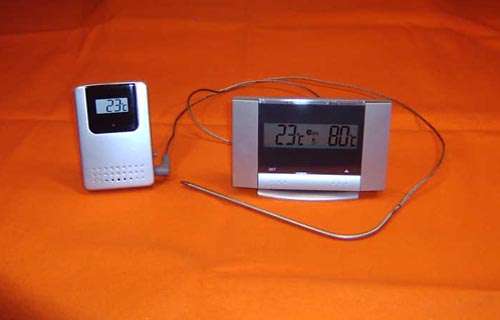
A little about temperatures up through the Smoking Oven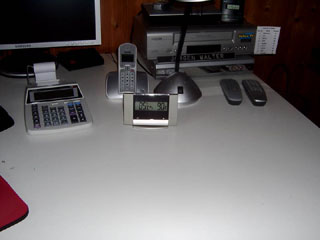
The picture above shows the temperature 85 °C in the Smoking Oven with a wireless roast thermometer at the receiver located in the office. It should be noted that the device shows around 10% too much because of a faulty sensor.
Here is the transmitter of the roast thermometer located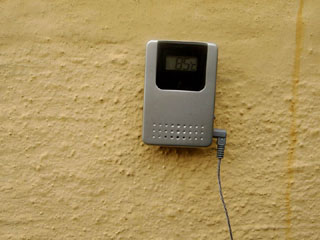
The transmitter also shows 85 °C. Actual temperature approx. 77 °C.
Output temperature from the Jet Hoodn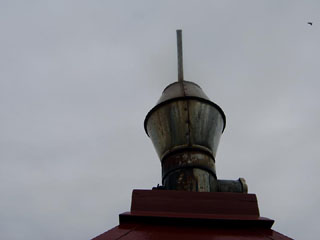
Output temperature from the Jet Hood measured with a standard glass thermometer and shows 65 °C.
A roast thermometer into the largest eel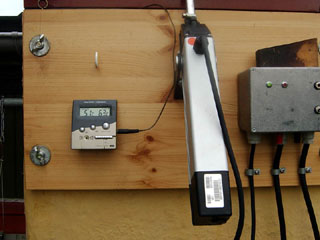
I put a roast thermometer into one of the biggest eel from the anal and down through the tail. Eels finished tender when the temperature shows 67 °C in the flesh. The thermometer shows here 51 °C. The eel weighed 990 grams after smoking.
The old bimetal thermometer on the front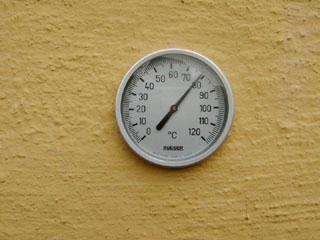
The old bimetal thermometer on the front of the Smoking Oven is closest sawdust tray and shows 78 °C.
The temperature at the bottom of Smoking Oven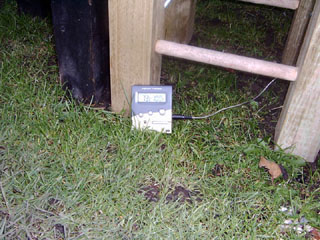
A thermometer shows that there is 71 °C at the bottom of Smoking Oven. The high temperature caused by radiant heat from the heater.
Master Temperature Controller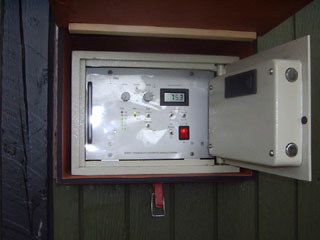
Here is the Master Temperature Controller that controls the temperature and actuator. The sensor is located in the middle of Smoking Oven, and should then show a mean temperature. Here is 75 °C.
The new bimetal thermometer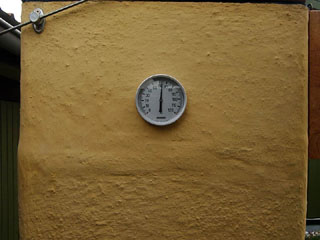
In the new Isokern chimney cap, I put a bimetal thermometer. It shows here 64 °C. The slightly lower temperature might be due to an eel touches the sensor. Be careful with this.
An overview of all thermometer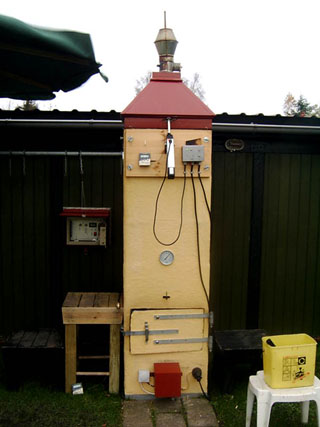
At the top is glass thermometer in Jet Hood. To the right is the wireless thermometer and transmit in to the office. Left at the top is the new bimetal thermometer. Beside the actuator is the roast thermometer, which measures the temperature inside the eel. Middle of the front is the old bimetal thermometer. The temperature sensor to the Master Temperature Controller is on the back wall in the same height as the old bimetal thermometer. Bottom left is the thermometer that measures temperature at the bottom of Smoking Oven.
It is not meant that You must have all of these thermometers in your Smoking Oven. But I think there should be two at least. A measuring temperature in the center of the eel. A measuring temperature of the output smoke from the Jet Hood. Final remarkIn the early phase of smoke, where eels are wet, there is much water vapor that must come out of the Smoking Oven. Therefore, there is a large temperature difference up through the Smoking Oven. This temperature difference becomes smaller when the eels are done smoked. You can use the two thermometers to shows this temperature difference.
New 2000 Watt heating element mounted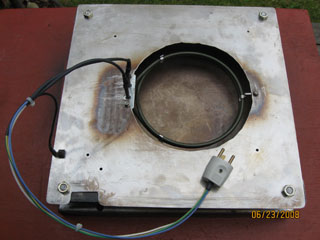
After several years of operation the old heater did not work anymore. The insulation between the heating wire and sheath melted away, and therefore gave short circuit to protection ground. On the Web, I found a new 2000 Watt heating element for DKR 295.00 used for a Blomberg convection ovens. If the heater can handle the job, should of course be tested.
Underneath the sawdust tray fitted a new 230 V fan ripped from a heat gun. It is necessary to transport the heat up and away from the heater. I will give more news when it is tested for some time. The new heater and fan has now worked flawlessly for a year, so it is recommended to use these two parts. |
My friend Thomas has made a wood smoke oven in the same size as my smoke oven in Isoknern elements
Wood smoke oven made by Thomas I have now installed the Actuator and we are sitting and enjoying a Pilsner beer |
Thomas has made his wood smoke oven in the same measure as my smoke oven in Isokern elements. When I moved I sold my actuator to Thomas and I fitted it for him. He then suggested that we could smoke together and we have been doing that for over a year now.
Since the smoke stove is made of wood, you cannot have the fireplace inside the smoke oven, so Thomas bought a small, used wood-burning stove in cast iron, which could stand outside. It was connected by a 2 meter pipe to the smoke oven. It "works" just fine. We can now cold smoke with a spiral at the bottom of the smoke oven and hot smoke with the small wood stove. 
Wood smoke oven made by Thomas The smoke oven is tested with bacon |
My Gastromax food salt strainer for 1 kg of smoked coarse sea salt. Sieve Ř 19 cm bought in Bilka. The chain 2 meters and 2 hooks bought in jem & fix. I had the three key rings in the drawer. A total of DKK 133.
|
|
Thomas has had a Pizza Oven for several years, but it was "stored" in a barn and was not used. When I saw it, I gave Thomas the good idea that it should be restored and put into the room with the smoker. It was not so easy, because the oven weighs around 800 kg. But with the help of a good neighbor with a forklift, it worked, but not without "cross strokes". The pizza oven split across the middle. You can see it in the picture just above the door - a strip filled with heat-resistant cement. As the good craftsman Thomas was able to fix it with "ease".
Now we are writing in the middle of October and it is time to smoke eels, therefore we must also inaugurate the Pizza Oven, so that we can get another round of bread while we wait for the results of the smoked eels. There will be pictures of our homemade pizzas later. 
Now the new Pizza Oven is ready for inauguration in October 2022 |
Back to the page where you came from.

one.com |